A buckler is a small shield held in the hand (rather than strapped to the arm). This was largely a project for practicing dishing and trying to get greater depth and cleaner edges than I had managed previously. Later ( after I got bored with polishing) it also became an experiment in oil-blackening. This isn’t really based on any particular example and as such makes no particular claims of historical accuracy.
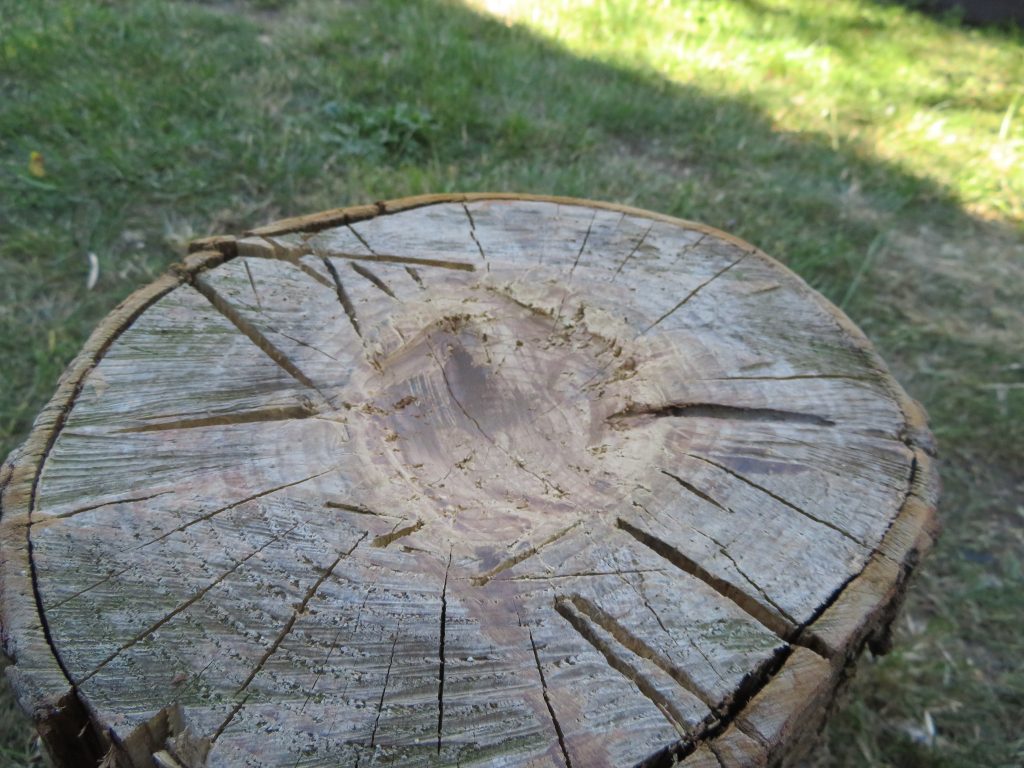
The start of this project was to carve out a dishing stump. I cleared out the bulk of the material with a handaxe ( Those wild cuts are from when the stump was previously used for chopping wood, i’m not THAT inaccurate) and then smoothed it out using a flap disk on an angle grinder.


I cut a circle out of sheet mild steel with hand shears, taking a rough guess at the size I wanted and adding extra diameter to account for reduction during the dishing. I overestimated how much reduction there would be so it ended up being larger than I intended. This was due to the fact that I was only dishing a section in the middle and leaving a wide rim around the edge, which would not get pulled in, meaning basically all the movement was from stretching and thinning the material rather than pulling it through.
I then marked out a circle for the size of the boss (bump in the middle) that I wanted and began a series of passes of dishing. This simply involves beating the metal down into the depression of the dishing stump, which I did using a 2 pound ball peen hammer. This was a newly purchased hammer, which I intended to add something with a bit more heft to my collection of hammers (most of the rest are really silversmithing hammers which aren’t big enough for larger jobs in steel) but after a long time away from bashing things with hammers this was initially rather heavy for me. A summer making armour does wonders for your right arm strength though.
As you can see in the pictures the dishing introduced some warping in the rim, which I had to work out. Once I had got the depth I wanted I planished it and went around the edge hitting it from the inside against the curved edge of my psudo-anvil (lump of iron I have gone at with an angle grinder to make different shapes) to make a clean edge to the boss.


I then rolled over the edge. I started by cleaning the surface o f the part that was going to be folded over to prevent rust being trapped in side. I then marked out about a centimeter in around the outer edge. I rolled the edge on this mark by beating it over a steak. I then made the base for the grip by bending a strip of steel. I cleaned the whole surface of both parts with successive grits of flap disks on the angle grinder and some hand sanding, which was a very non ideal process that lead me to get bored and decide to try oil blackening it instead.
Oil Blacking
I had done a tiny bit of oil blacking in engineering ( read: metalwork) GCSE a long time ago and some cheats blackening with stove black on the armouring course I went on but I needed to do a did a bit of research to work out what the proper process would be. This yielded two main facts: that you could really use any kind of oil; and that there were broadly 2 possible methods. You could either heat up the whole piece and then quench it in the oil or heat the piece and then wipe on the oil a section at a time. I would have to go for the second option as I had neither a method for heating the whole piece or enough oil to hand to fill a vat of sufficient size to dunk the whole shield in it. As to the choice of oil, I selected olive oil purely for its virtue of being quickly acquirable through a raid on the kitchen. To heat the buckler I used a propane torch.


")
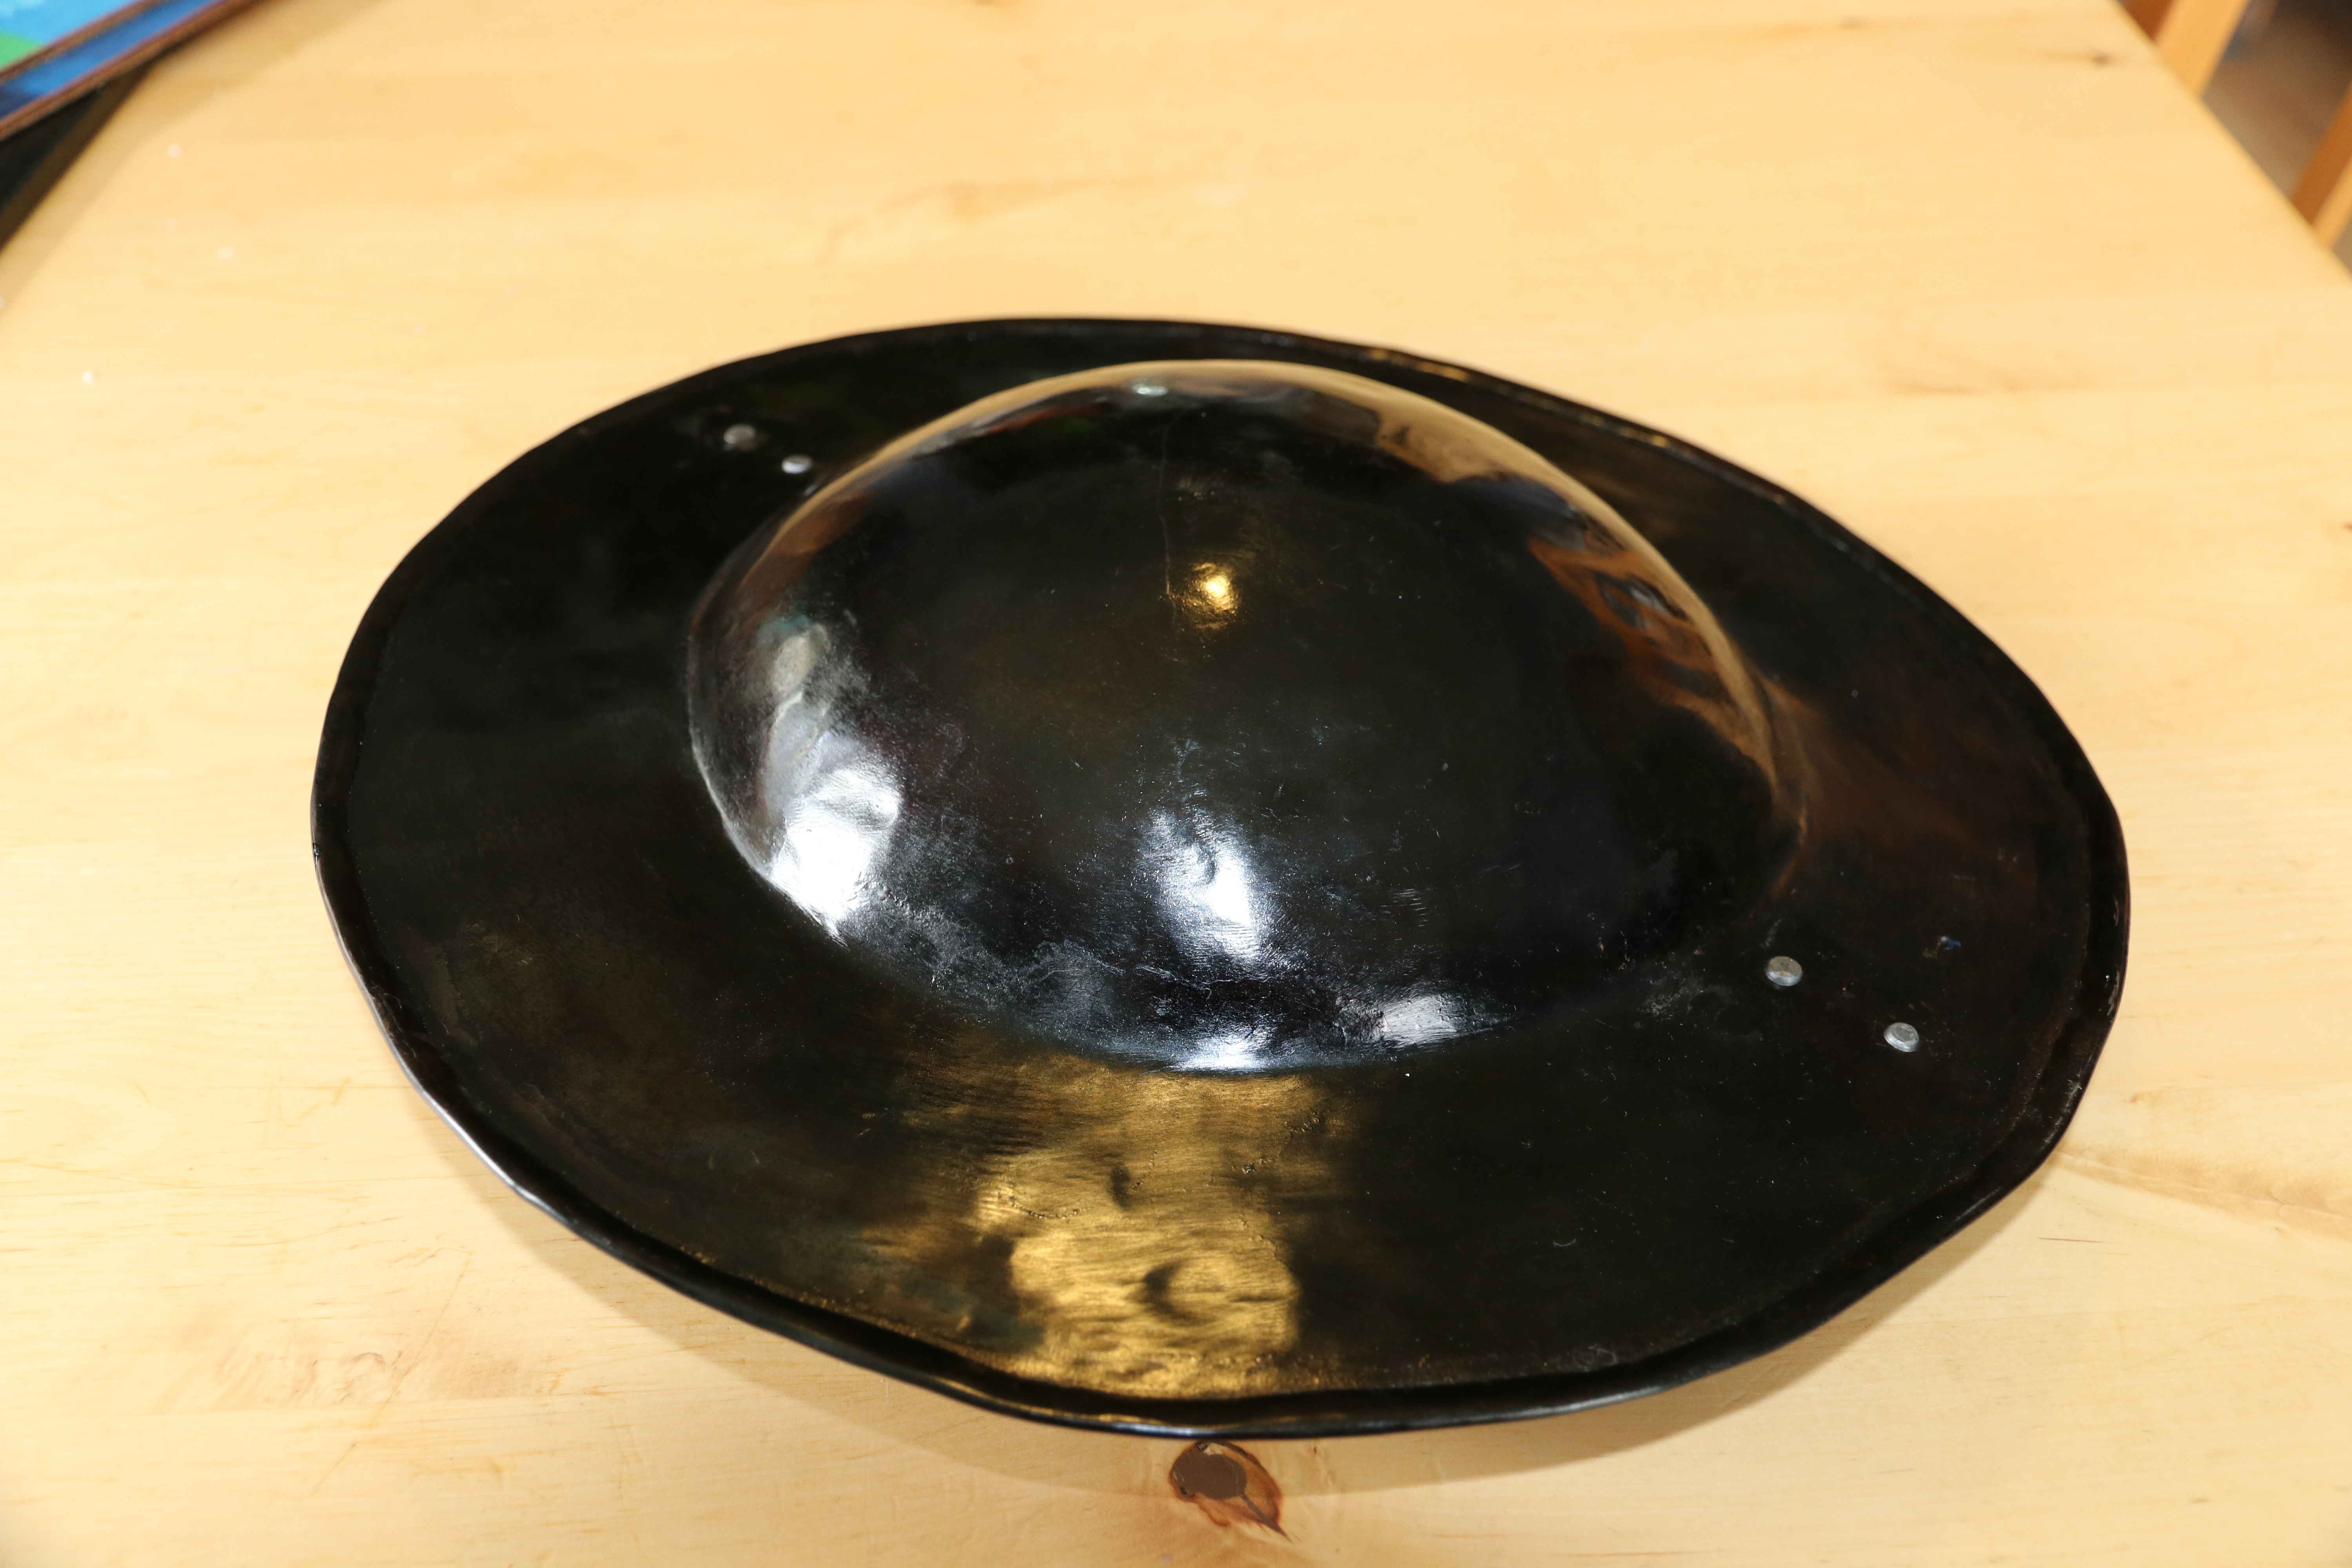
After heating up the whole buckler and surrounding area I worked on a process of heating an area of the shield, applying the oil with a spray bottle and a rag, and then heating that area from the opposite side to bake on the oil until it reached the desired colour. The problem I encountered was that in some cases the oil would some how ‘burn off’ and patches would return to the silver colour of the metal. This seemed to be related to areas getting too hot as once this happened this area would remain stubbornly un-oiled no matter how much oil an heat was applied until the whole thing was allowed to cool completely and the process started again. Over three attempts the buckler moved through a yellow colour, to brown, and finally had an even shiny black finish.

I then fitted wood on either side of the metal for the handle, securing them with large rivets sold for attaching spade heads with. I painted the backside of the buckler with black paint. Once the paint was dry I drilled two holes on opposite sides of the rim and riveted the handle on to the buckler.


")
(Shout-out to my father’s hand for being in this picture)
Overall this was a relatively simple piece of metal work that served as a good project to get back into the swing (pun very much intended) of hitting things with hammers. Learning oil blacking is also pretty valuable as it was a commonly used finishing technique for armour historically and, crucially, is much less tiresome that polishing things.