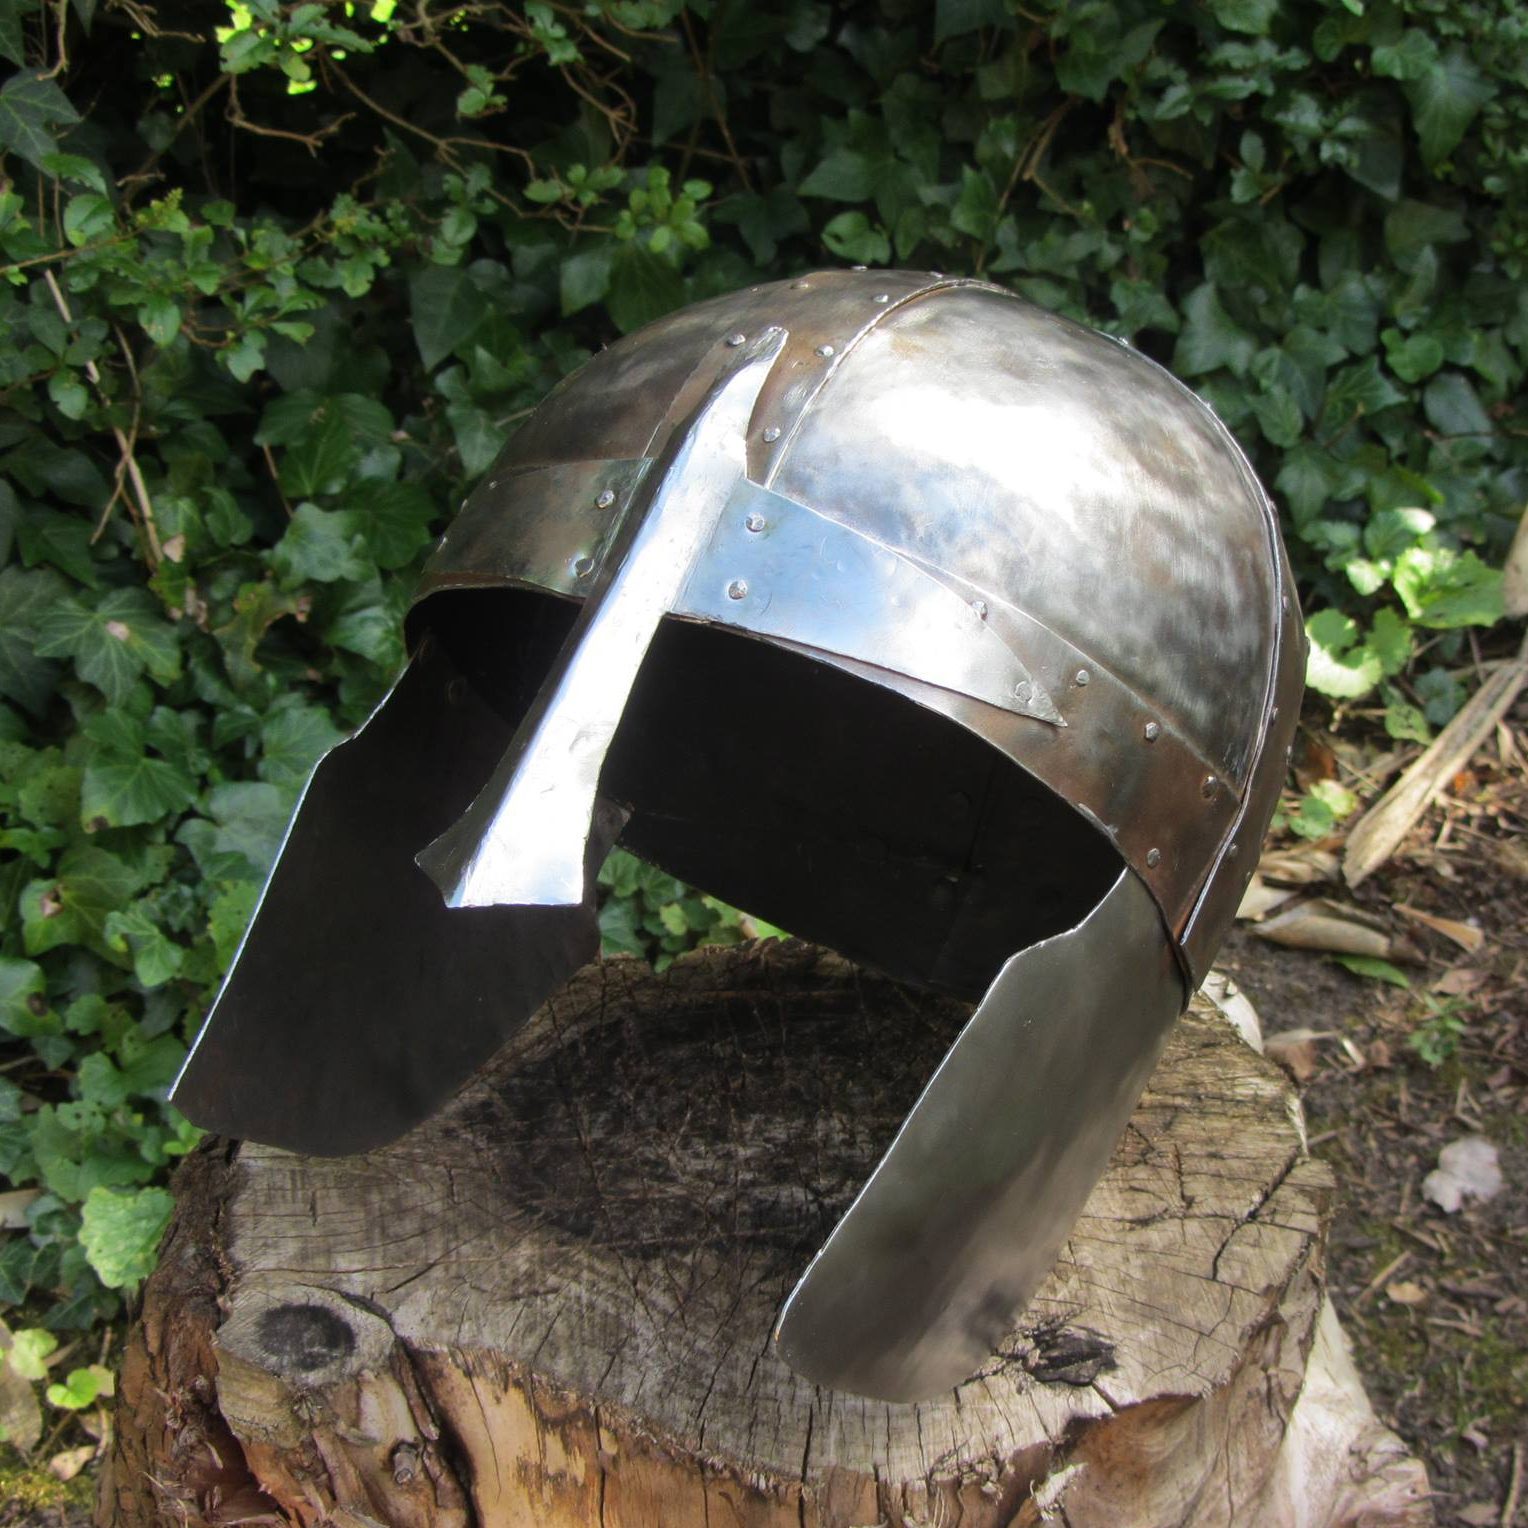
Armour is probably one of my favourite things and what really got me into making things. I had always liked craft but digging into information about making armour on the internet (large amounts of it wildly inaccurate) was what got me properly interested in taking on some more substantial projects, the first of which was this helmet which I made ~5 years ago. The helmet in question is a type of nasal helmet (referring to the bar sticking down covering the nose) called a spangenhelm, which is a word of German origin referring to the strips that form the frame of the dome of the helmet. Its is a design from the early middle ages which is fairly straightforward to construct and was later superseded by helmets of the same basic shape but with the skull constructed from a single piece of metal which, while being sturdier are a reasonable amount more tricky to make. The main difference as far as I am concerned being that heat would be required whereas with the spangenhelm, while it would be easier with heat, it is possible to make do without (this is only the case for modern people with access to pre-rolled sheet steel, historical smiths would not have this this luxury).
As this project is so old I will not be able to do a complete tutorial and some of the steps may be slightly vague. If you want to make a similar project then I would suggest doing a bit further research.
What I Made
My helmet has a number of issues, the foremost being that is doesn’t really fit me. This is partly due to it being completely circular around the brow, rather than something a bit closer to the actual shape of a head. It is also partly just down to being a bit too small, which is most noticeable when you are trying to put it on as the cheek plates will have a bit of a fight with your face as you try to do so. There are also a few issues with the shape relative to historical examples. Typically nasal helmets seem to be fairly conical in shape rather than the more spherical dome I ended up with. Thinking about this now I would say that this is because the shape I used actually presents a relatively flat surface on the top, meaning any blows from above (which is really where a large number of blows would come from) would not glance and would transfer most of their energy through to the wearers head. On the other hand a conical design would provide a better glancing surface and thus better protection.
The other thing that I notice looking at more examples is that the nasal is usually flat and even when it does have an angle put into it it is much less pronounced than the one I put on mine. This is a bit harder for my to work out as it seems like my design would be stronger and less likely to give way if it were struck. My guess is that the angles on my design may run the risk of redirecting thrusts into the wearers eyes, though I think that in any situation where this were to happen the result would be pretty similar if the the nasal were flat.
One important element that is missing entirely is the leather suspension that would run around the inside of the helmet and cause it to float above the wearers head rather than the steel sitting directly on top of your head (equivalent to what you would see on the inside of a builders hard hat) . Without this the helmets effectiveness is greatly reduced as, even with padding, and impacts are largely transferred directly though the helmet into the wearer’s head.
The final issues with the helmet are simply issues of execution: It is overall slightly lopsided and the overall finish is not as good as I would like it to be if I were to remake this project now.
How I Made It
The main process used for making the helm is ‘dishing’, which is in principle fairly straightforward. Dishing involves hammering a piece of sheet metal into a concave recess in order to curve the metal in multiple directions. It requires two tools: a dishing stump and a hammer.
A dishing stump is most commonly made from a fairly large tree stump (hence the name) but really any bit of wood will do. Ideally it should be reasonably substantial so as to have enough mass as to not bounce around every time you hit into it. What I ended up using was a rather lightweight tall thin-ish bit of wood that was left over from some building work that had been done on our house (looking back at the picture of the helmet you might notice that its sitting on a stump that looks pretty much like what I initially described and wondering why I didn’t use that and to be honest so am I). Once I had selected my stump I then cut a concave bowl shape out of it with a chisel and hammered inside it to compact the wood and harden the surface. The exact shape is not hugely important as you are not hitting the metal into the inside surface of the form, just in to the space. All the form needs to have is an rim that will support the piece and a void into which you can push the metal. As for the hammer you need something with a reasonable amount of weight to it and a fairly rounded surface without any sharp edges. The hammer also needs to be of an appropriate size to fit your dishing form.
The first thing to do before starting hammering away at metal is to work out the pattern. This is a stage that I didn’t execute particularly well, which Is why my helmet didn’t really fit properly. To work out the pattern start with a measurement around the circumference of your head and then add on a fair amount to allow for padding. Use this measurement to make a long thin rectangle (out of card at first), which will be the brow band running around your head. Then you need to measure over the top of your head front to back and left to right (again adding on some extra for padding) and make two more long thin rectangle to these measurements to from the bands that go over the top of your head. now put these pieces together and try out the card version of your helmet and see if it works. If it doesn’t go back and adjust your pattern. Once you are happy with the pattern you can then cut these pieces out of some sheet metal using shears. Then take a file to the edges of the pieces to clean them up and remove any sharp bit left from the cutting.
Now to curve the these pieces. This can be done using the dishing stump or, as they only need to be curved in one direction, just by hand. It is important to not give them perfectly circular curves and instead ones that are closer to the shape of your head. Once this is done the strips need to be attached together, which will be done by riveting. First holes need to be put in, this can be done with either a punch or a drill. Using a punch is easier when holes are near the edge but for some holes later in the build using a punch will not be possible so a drill will be necessary anyway. To rivet the pieces together I used nails. Placing them through the holes with the head on the inside then cutting them down leaving a small amount protruding and peening that down with a hammer against a hard surface.
Once the frame is together I then used that to create the pattern for the plates that fill the gaps. To do that I the rolled the frame on a piece of card, tracing the line given by the inside of one of the gaps. Then I expanded that shape by ~2 cm in each direction to give the overlap that is needed to rivet the pieces together. I did this for each of the spaces to produce a specific pattern to fit each part of the frame.
At this point is where we finally get to use the dishing form we made earlier. Once I cut out and prepared each part as I detailed previously I then started dishing each one. Dishing is a fairly slow process (especially if you are doing it without heat), requiring many passes to create a significant amount of depth. It is done by starting in the middle of the piece and working out to the edges in circles. I found it best to be striking with the hammer in the same place towards the edge of the form nearest to me and turning the piece around to move where I was hitting. Each hammer blow doesn’t need to be particularly hard, just slowly work around the piece and then start another pass. As metal is worked it becomes ‘work hardened’. The stress you are applying to it causes its internal structure to change and make it harder which means it will be more difficult to work with. If you are able to then it is best to anneal the piece when it starts to go too hard, which involves heating it up and then letting it cool to return it to its original hardness. I managed to get away without annealing anything so this should be achievable without but it would be easier if you are able to do so. Once the piece is starting to get close to the final shape try and fit it into place between passes to see what bits need more work to get it to the correct shape.
Once I had made all the plates it was time to rivet them into place, which I did by the same method described earlier. For the first plate all the holes can all be made through both the frame and the plate simultaneously using a punch. For some of the later plates it isn’t possible to reach with the punch so A drill has to be used instead. I found it was easier to punch the holes into the frame first before putting in the plate and then, once the plate has been fixed in place along the bottom, to drill through using the holes in the frame as a guide.
For the final parts (the nose and cheek guards) much the same process is followed. The pattern can mostly just be designed arbitrarily as it isn’t particularly important how these parts fit together. The only real difference is for the nasal. If you wan’t to put a crease down the middle then use something like a blunted chisel or an old axe head and hammer the piece over that then use something hard with a a sharp right angled edge to increase the angle if you wish.
The final stage is to give it a surface finish. I would recommend painting the inside as it will provide good long term rust protection. For the outside you could polish it, oil black it or paint, which was done historically more than we think partly due to over zealous 19th century museum curators polishing away historical paintwork.
End
That concludes the building of the helmet. If you make one be sure to clean it regularly so as to prevent it from rusting, which is what I didn’t do with mine and it is currently is quite bad condition. Armour is definitely something I would like to come back to and I am working on some ideas for a second helmet, though that isn’t likely to see any work until next summer unfortunately.
A cool helmet, always see this helmet when the film is colossal