Who doesn’t love swords? well I don’t like them quite as much as I did after the hours I have put in making this one, messing it up and having to try and rectify my mistakes and generally making a bit of a meal of it. I started this project almost 2 years ago, largely interrupted by the small inconvenience of going to university but even with that it still ended up being quite a lot more work than I had originally anticipated. With that in mind, if you are here looking for a tutorial on how to make a sword you are in the wrong place. My main advice to anyone considering trying to make a sword would be ‘don’t’ at least not until you have honed your skills on smaller things, I think a knife would be a much better place to start rather than diving in at the deep end like I did. My second piece of advice would be to avoid doing a fuller (the groove running down the middle of the blade commonly, and incorrectly, called a blood groove) as without more advanced tools getting a good fuller is pretty difficult, time consuming (you will notice mine only goes half way up the blade) and you run the risk of, as I did, putting a hole in your sword. For those of you who are not deterred by this (or are just interested) I will give an overview of what I ended up with and the process by which I made it.
What I Made
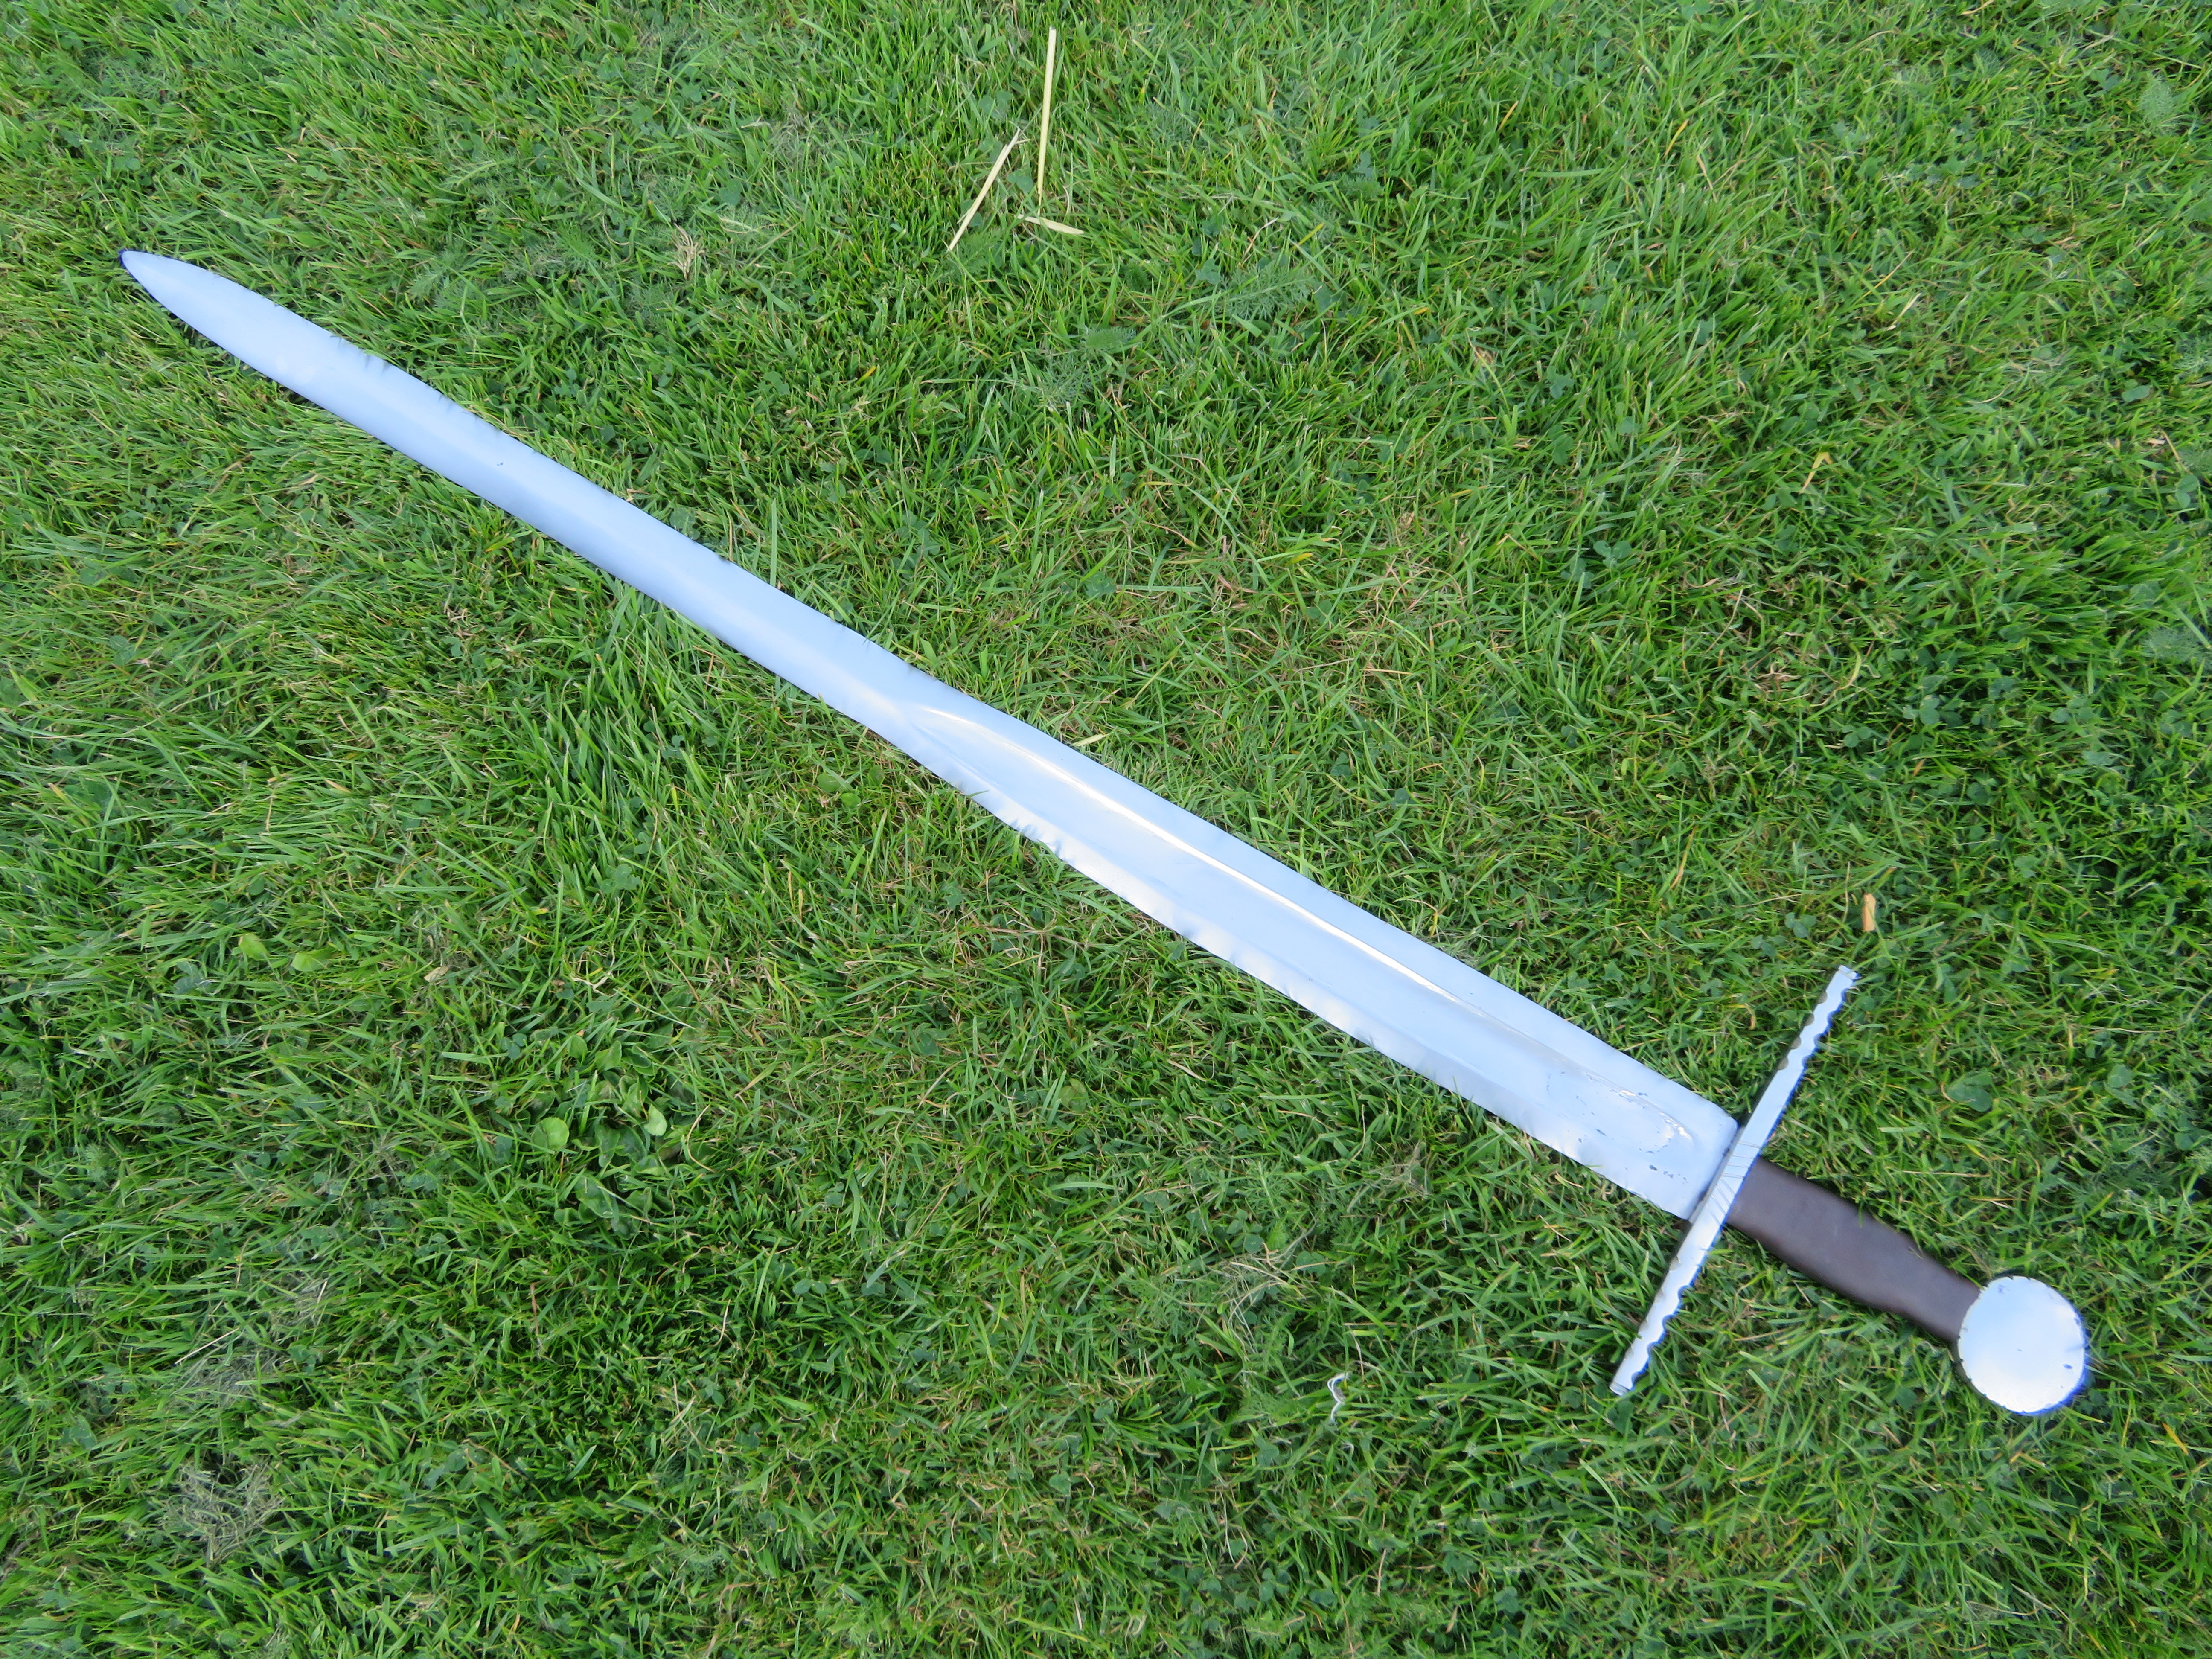
Despite what this article is named I didn’t make a sword, not really anyway. If you were to use this in battle you would be in a bit of trouble, for one thing it is about as sharp as a butter knife with the only vaguely offensive part being the point, it is also only made of mild steel which makes it rather soft and, at the thickness it needed to be to have a balance similar to a functional sword, very floppy. So in reality what I made is something that looks like a sword and feels a bit more like a sword than a stick but is pretty much just a decorative item.
How I Made It
The initial stage of making the sword was done in a blacksmiths forge where I forged the metal parts into their general shape.
The sword consists of three metal parts:
- The blade, which is the the main obvious ‘sword’ part of the sword and also extends through the hilt as a part called the ‘tang’.
- The crossguard, also called quillons if you want to sound fancy, is a bar that slides over the tang and protects the users hand.
- The pommel, which placed behind the grip and the tang, which is then peened (hammed down) to fix it in place. The pommel serves the dual purpose of holding the hilt construction together and also providing counterweight to the blade to bring the point of balance further down the blade (although this is not always the case as many historical pommels were actually hollow).
no images were found
I began by making the pommel. It started as a billet cut from a cylinder, which was forged out to bring it to a flatter cylinder with a slight taper towards the edges and then drilled a hole through it for the tang to go through.


The cross guard was forged from a flat bar. This was marked up and then a chisel was used to create the hole that the tang would go through. I then forged a taper on each side to bring it to its final shape. My first attempt was left in the fire for too long and ‘burnt’ causing it to be overly pitted, which meant I had to repeat the process to make a new one, which turned out better than the first as I had had more practice.


Then we come to the most substantial part, the blade, which began as a long flat bar slightly shorter then the final length of the sword. If I had more time at the forge I would have started with a shorter length so it would end up with a much stronger distal taper, which is an important factor for balance, without having to grind it down, which is much more time consuming. The blade was made by first forging the tang, then the fuller, which was done with a custom made tool, and then finally tapering out all the edges into a more blade like shape. This was the point at which the first major issue was introduced, which was that the edge was very wavy (in both directions), rather then straight. Once the forging was done there wasn’t really any way to fix this so the problem persists in the final incarnation.


After this I did a small amount of grinding to clean everything up and then fitted everything together. First the crossguard was placed on the tang. Then the tang was heated up and the grip, which was simply carver from an old hammer handle (the square space is because I was thinking about inlaying some horn, an idea I since abandoned), was pushed on to it, burning away the inside, which ensured a tight fit. Finally the pommel has placed on leaving a part of the tang protruding, which was then hammered down to hold everything in place.
Finally I added leather around the grip, which proved to be slightly difficult once the sword was fully assembled, so the edges ended up rather less than flush. The only particularly note worthy part of this stage is to thin the leather on the ends that will overlap with each other, which means there won’t be a large and obvious seam that would be likely to peel away after a while of handling.
This was then the state that the sword was left in for quite a while until I came back for summer from my first year at university, when I decided I wasn’t happy with how it was and I wanted to take it apart and improve it. This is where a lot of my troubles started.
no images were found
The main problem I faced was the tool I was using to shape the blade: an angle grinder, which is very much not ideal for the task. A belt grinder would have been much more suitable, and even then a specialist belt grinder called a ‘linisher’ is what actual bladesmiths would usually use but these a bit too pricey for me so I had to make do. The main aims from the grinding were to: clean up all the surfaces to remove pitting, taper the blade and to enlarge the fuller.


Cleaning the surfaces was fairly straightforward and did not pose any real problems. Tapering the blade, however, proved much more difficult as it required the removal of a lot more material and it was quite easy to accidentally take off too much material as the blade thinned toward the edges. This is what ended up causing me to thin a section in the middle much more than I meant to, resulting in more of a ‘neck’ rather than the gradual taper I had intended. Expanding the fuller was probably the most troublesome part as the angle grinder was very much ill suited for the task. I ended up managing to grind almost all the way through at one point leaving a foil thin section with a crack through it (Rather embarrassingly this was very shortly after being warned to be careful about grinding through it). To solve this I had to get the hole welded up, which cleaned up fairly well and didn’t leave too much of a mark.
no images were found
The next thing I wanted to do was to add some decorative file work to the hilt to make it look a bit nicer. This was probably one of the easiest stages and turned out pretty well. The straight lines were simply cut in with a small triangular file with the initial cut starting on a corner and then working across much like you would when cutting with a saw. The round cuts were started with the triangular file and then expanded with round files.
Then everything was polished. At this stage I did not really have the patience for polishing and was very aware that summer was running out and I wanted to move on to other things so the level of surface finish is not anything particularly amazing.
At this point I made the handle thinner and redid the leather by the same process as before but this time as it was detached from the rest of the sword I was able to get it much neater.
Finally It was time to reassemble the sword, and even this final step proved to be a bit tricky. The trouble was that in order to take it apart I had to grind away some of the tang as everything had been such a tight fit. This then meant that when the crossguard and grip were put back on they were incredibly loose and there was a lot of rattle to everything. To keep the cross guard tight I mixed up a paste with some wood glue the leather shavings I made from thinning the ends of the leather and then used this to fill in the gaps between the tang and the crossguard, which worked surprisingly well. The problem was that I thought that once the pommel was peened in place the grip would be held in place between the cross guard and the pommel. This was not the case. Once the pommel was peened in place, however, I couldn’t then remove it again as, without access to heat, I has to grind the the protruding part of the tang away to take everything apart and if I were to do this again I would not be left with enough to peen the pommel in place again. So I would have to leave it as it is: slightly wobbly.
no images were found
That then concludes my first article. Im not really sure about a good way to ended it so I guess I will just stop.
wow, awesome