This is the first project I undertook after having the idea to make this website so it will also be the first one that can form a full tutorial with process pictures throughout.
The Tools I used
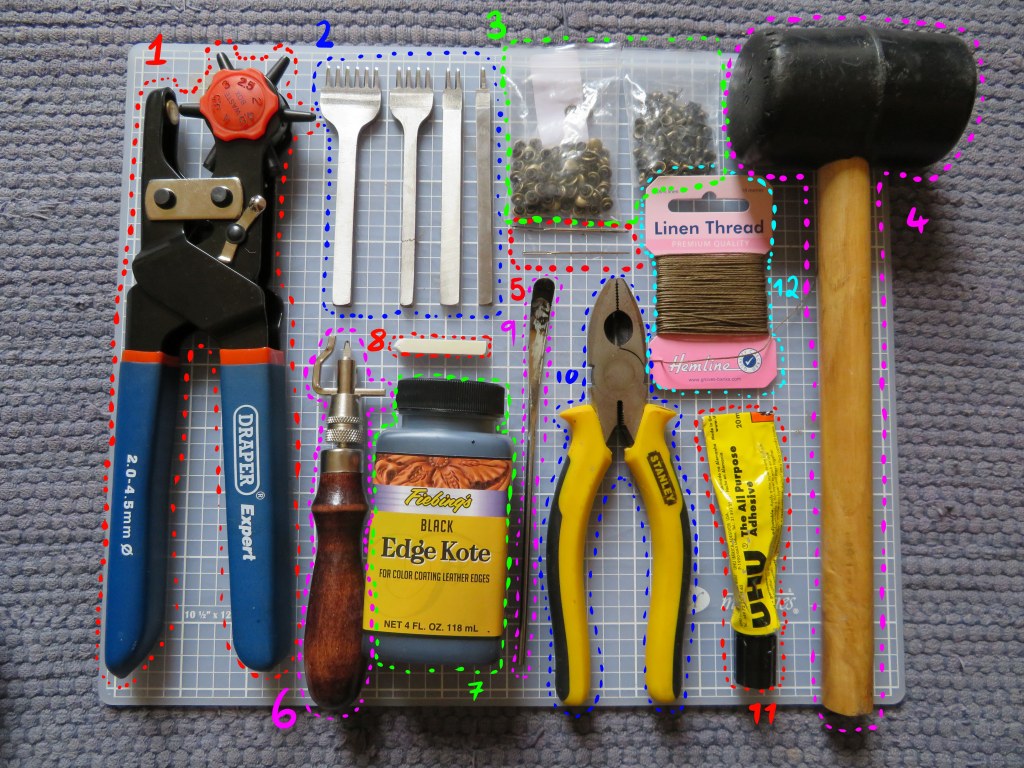
- Leather punch. Used for punching holes of various sizes.
- Diamond stitching punches. Used to create the holes for stitching with even spacing. Diamond refers to the shape of the cutting point and not the material.
- Leather rivets.
- Rubber mallet. Used for cutting with the stitching punches and for the rivets.
- Sturdy rounded needles.
- Stitching groover. Used to mark a line a consistent distance from the edge for where the stitching will go
- Edge kote. Used to finish the exposed edges. Other processes can be used depending on your leather but I found this leather was too thin to burnish.
- Chalk. For marking up the leather.
- Spatula. For spreading the edge kote.
- Pliers. Useful for pulling the needles through the leather and saving your hands.
- Glue. For holing pieces together while putting in stitching or rivet holes. The type isn’t hugely important so long as it says its suitable for leather.
- Waxed linen thread.
How I Made It
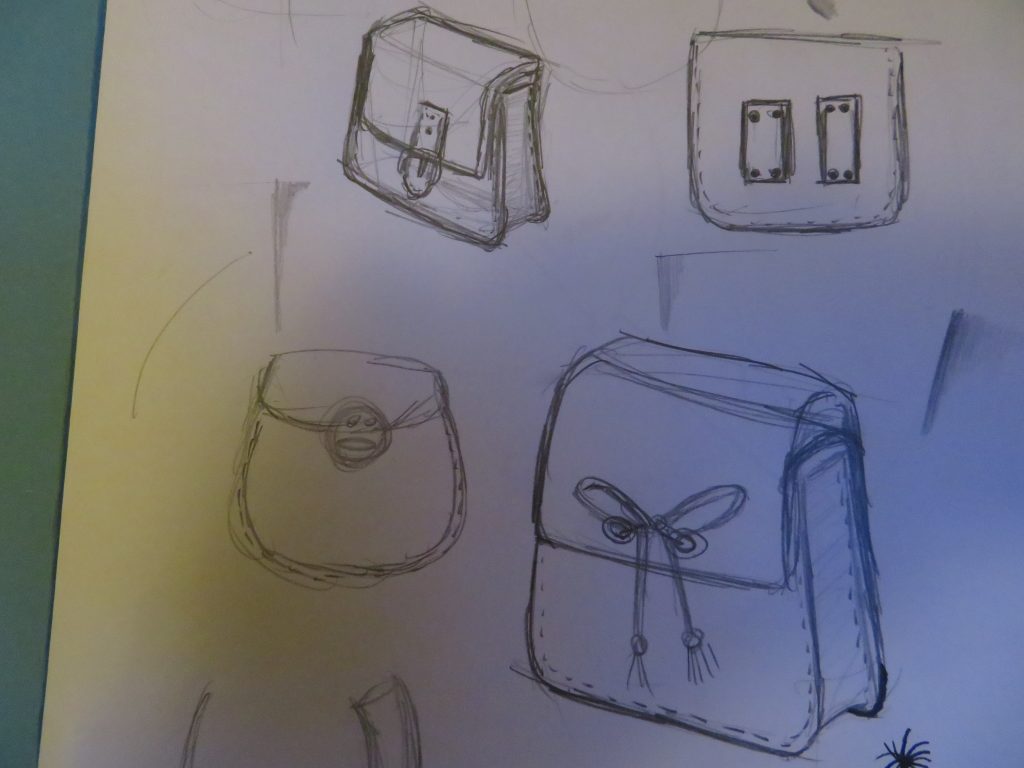
I began by sketching some ideas of what I wanted the bag to look like, finding various references on the internet and picking out ideas and shapes that I liked. Then I drew up the pattern based off of these sketches (its at this point in writing the article that I realize I have no pictures of my pattern so have already failed in what I claimed I would have not one paragraph in). To make the pattern first I drew out the shape I wanted the front of the bag to have (at this point you should check to see that things like your phone or camera that you might want to carry fit into this shape with space to spare). Then I copied out this shape again for the lower half of the back. Here I needed to decide how much depth I wanted the bag to have (again basing this off of the size of things that need to fit in the bag). I took this value and added around 1.5-2cm on to this and then drew two parallel lines up from the top corners of the pattern for the back piece, this will be the bit that goes over the top of the opening to the bag. Then I turned the original shape for the front upside down and, starting from the end of the parallel lines, I traced about half way up it and then drew a straight line across. This part is the bit that folds over the front.
Then I measured the distance around the edge of the front shape, excluding the top edge and drew out a rectangle of this length (I would recommend adding a bit to this length ans it was quite a bit of work to make this piece fit and it would have been easier if it had been oversize and I just cut off the excess) and with a width the same as the ‘bag depth plus 1.5-2cm’ distance I used before. This is the piece which joins the front and back parts of the bag. Finally I made pattern for the buckle fixings, which are very dependent on the buckle you will be using.
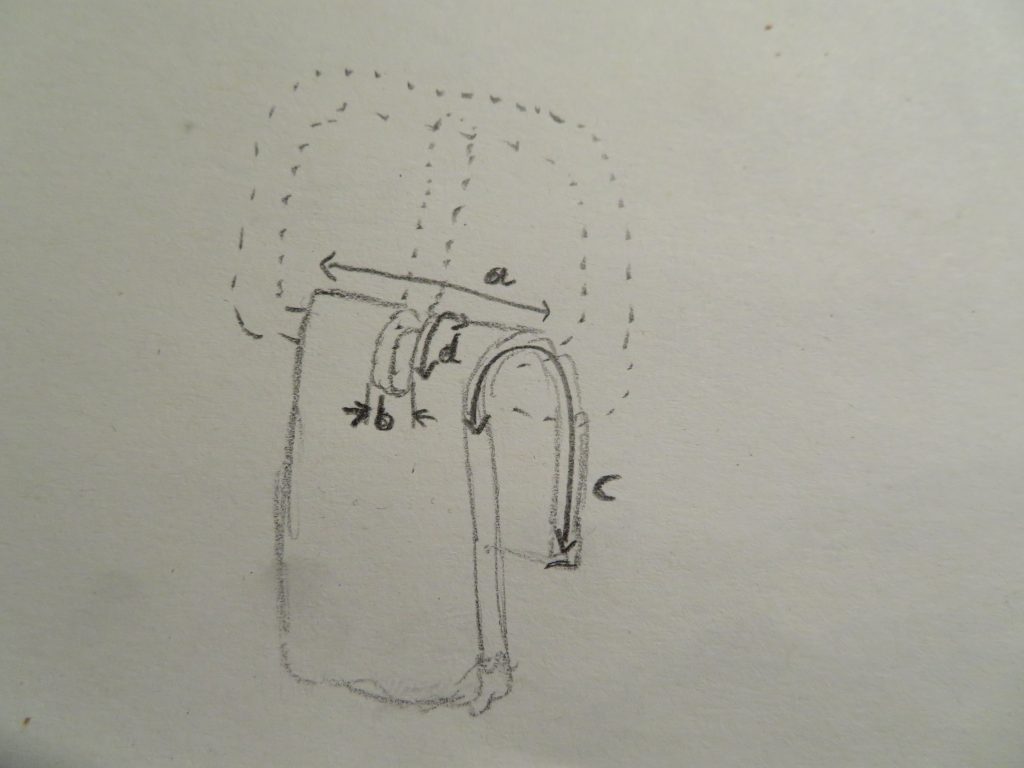
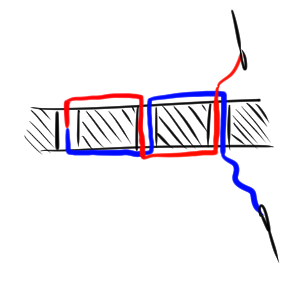
The main dimensions that are important for the part that will hold the buckle are shown in the diagram. The width of the part, a, must be slightly narrower then the inside width of the buckle. There needs to be a hole of width b that is slightly wider than the width of the prong of the buckle and of length d that is sufficient for the prong to rotate through a large enough angle to function. Finally it need to be long enough in c to loop round the buckle and have enough spare to be stitched and riveted to the front part. For the part that goes through the buckle it simply has to be of width a and also be of sufficient length. The shape for the ends of these parts is mostly an aesthetic choice. I chose to have them both be the same at the ends but they could be different.
Finally I drew up two small rectangles to go on the back which the belt will go through. These just need to be long enough to fit the width of a belt plus have room on either side to be attached by.
When I had drawn and cut out all the patterns on card I then arranged them on my sheets of leather trying to make the most efficient use of the material. I then used chalk to trace around the patterns and mark onto the leather. Then I cut out the pieces using a pair of textile scissors. This is probably are not the most ideal way to cut leather but it seemed to work well enough.
Now seems an appropriate time for a short side note about the leather I am using. As I did not buy the leather myself and It came as a collection of cut offs I am not entirely sure as to exactly what kind of leather it is. The important thing about it for this project is that it is fairly thin and flexible. Trying to make the bag with stiffer leather would be quite tricky.
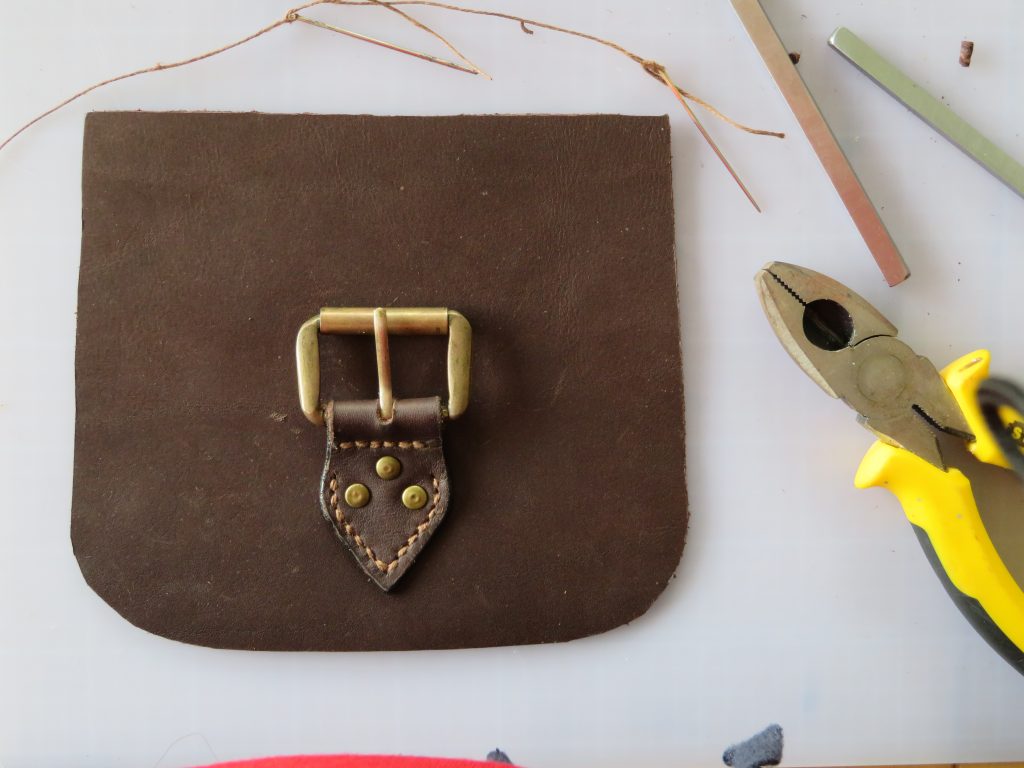
I started by attaching the buckle to its piece of leather. I slotted the prong through the hole then wrapped the piece around the buckle. I then punched a hole through both layers and attached them together with a rivet. The rivets come in two parts one with a smooth face and the other a hole in its surface and a rod that fits into the first part. To fit them together place the first part in the hole then put the other part in from the other side. Then hit it with the mallet from the backside to fix the rivet in place.


Once the needles are threaded start by putting one needle through the first hole and drawing it through until there is half the thread on each side of the hole. Then pass one of the needles through the next hole from one side and then the other needle through the same hole from the other side. The diagram shows what the stitching should be like. Repeat this along the whole length and, when you reach the end go back a few stitches and then take one thread one stitch further and tie them off. It isn’t strictly necessary to tie off but I like to be doubly safe.
I then ran around the edge where I wanted yo put the stitching with the stitching groover. It was easier to do this before attaching it to the other piece even through there were a few more steps before I came to the stitching. I also painted the exposed edge with a few layers of edge kote as it would be imposible to do this once it was attached without also getting it on the front piece. To apply the edge kote I used a metal spatula though I would guess that a paint brush would actually be more effective. I applied a layer and then let it dry before sanding it flat and applying another layer. I repeated this until A layer looked good enough left shiny.
I then glued the buckle piece into place on the front part of the bag and punched two holes and riveted through them. Punching these holes is a bit tricky as it is necessary to bunch up some of the leather to get it far enough into the jaws of the punch. I then punched the stitching holes and stitched it.


I then applied edge kote around the remaining edges and finished it off by punching the holes for the buckle prong to go through. To work out the position for this I just did a test fit and marked where the prong wanted to go though and then punched a hole there.
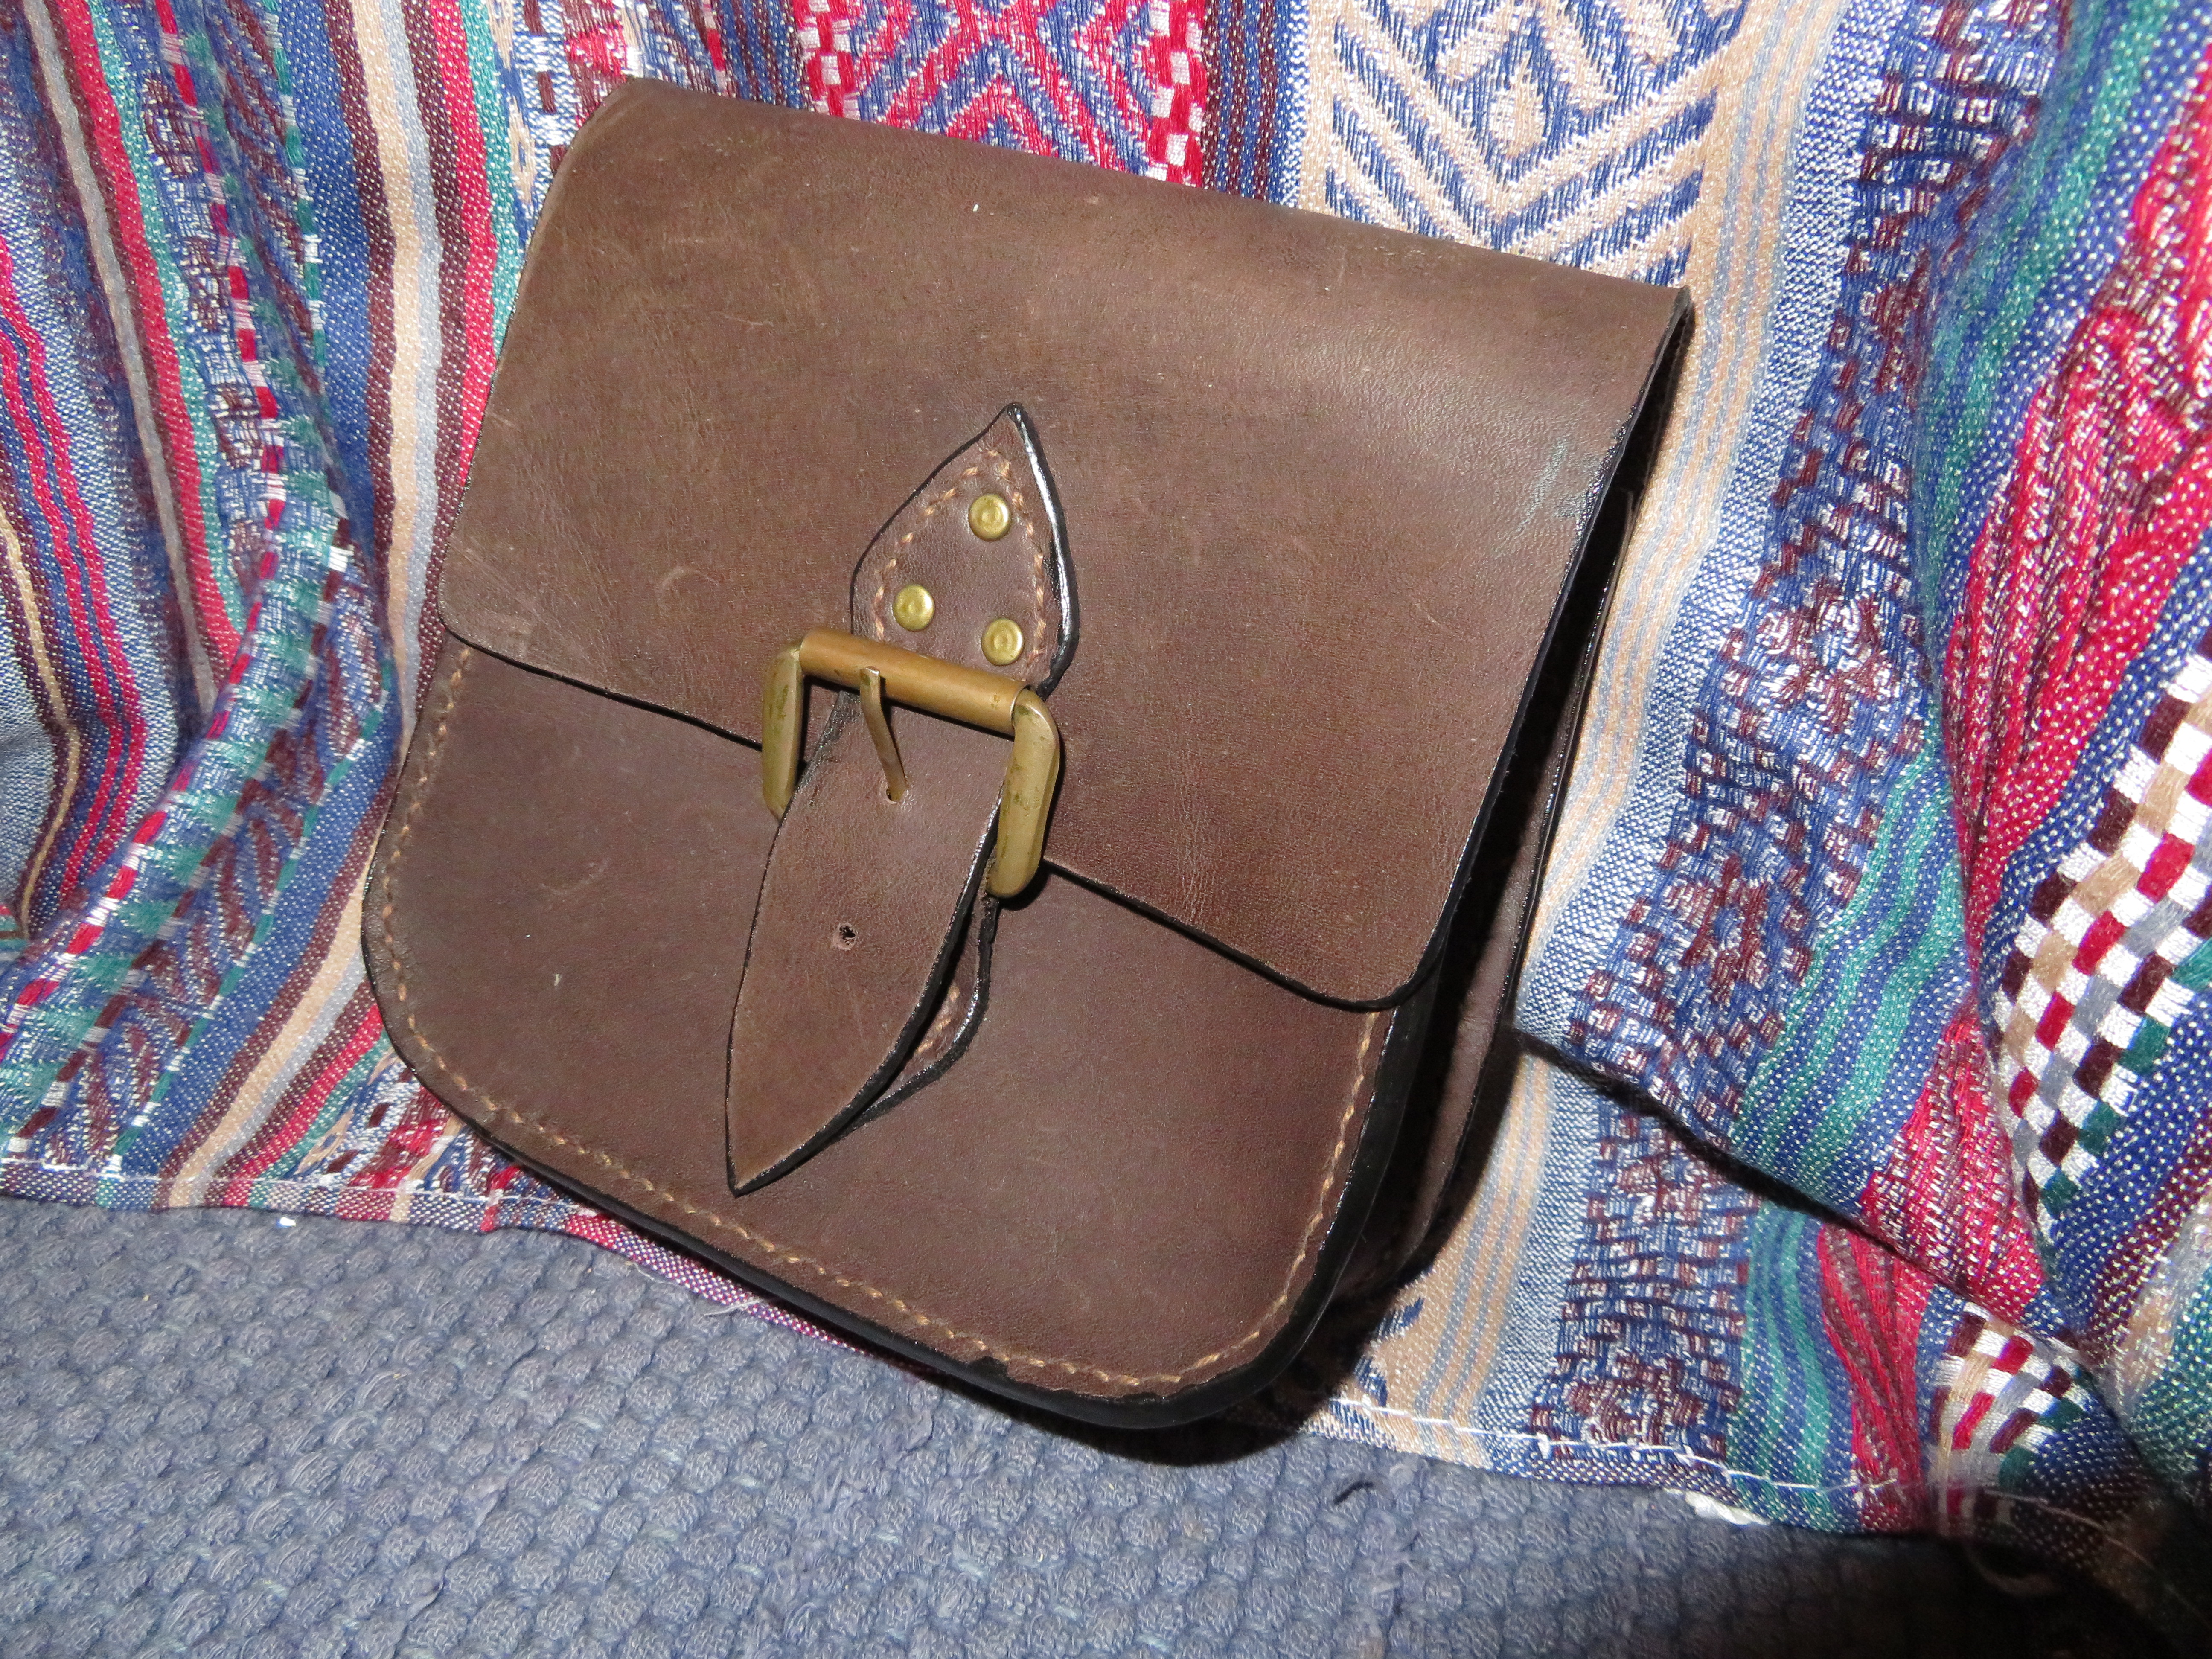
If you have followed this you ought to now have yourself a nice leather belt bag. My intention when making it was for the too loops on the back to go on either side of a belt loop on your trousers so as too hold it in place. Alternatively to save having to undo your trouser belt whenever you want to put it on or off you could make or buy a dedicated belt to put it on. If anyone our there does make one I would love to see a picture of your results (though I am not expecting anything any time soon the amount of traffic I have at the moment).