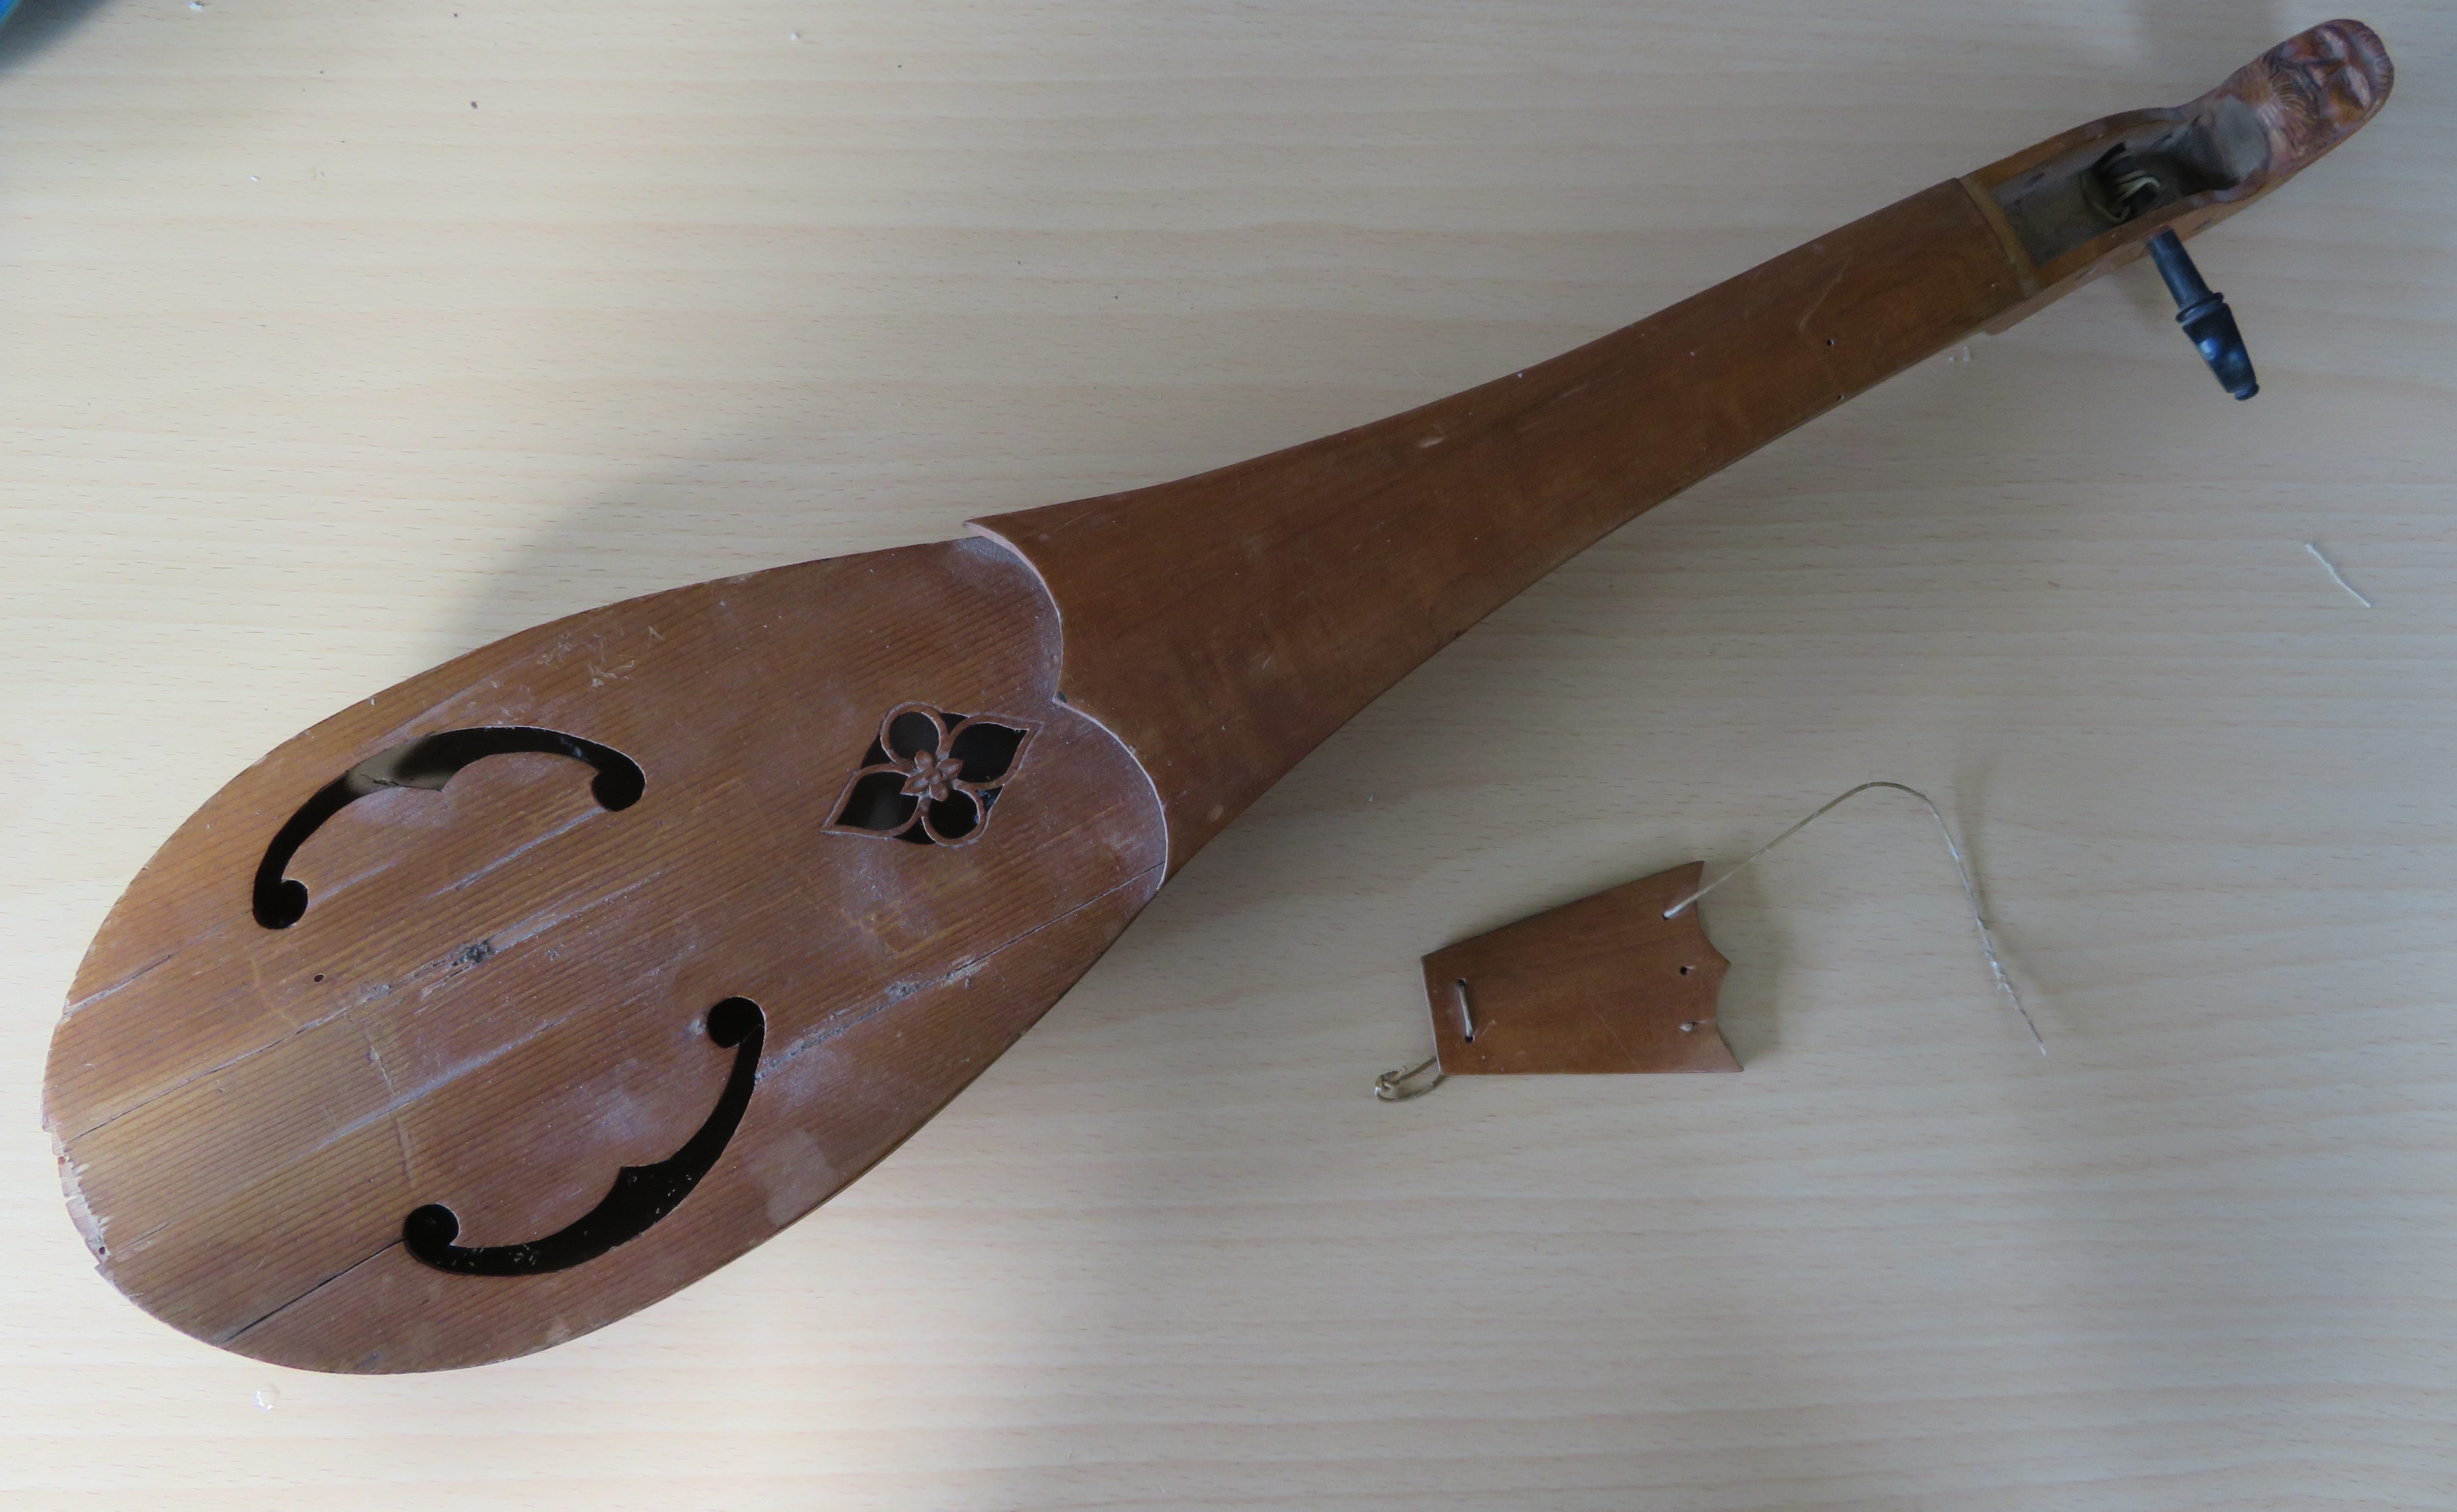
This instrument caught my eye in my granny’s house where the carved head was poking out from on top of a cupboard so I got it down and found something desperately in need of some attention. After consulting with her it was identified as a rebec, which is an old relative of a violin, with only 3 strings and half round body somewhat resembling that of a lute. This particular rebec had clearly taken a bit of a beating over the years and a number of parts where either missing or broken, so I thought I would take it upon myself to try and repair it and get it back to a playable state.

The keen eyed among you will have noticed that this is listed as part 1 and that is because at the time of writing I have only got so far with this project and will not be able to work any further on it for a while what with university and not having access to my woodworking tools. Therefore, this article will include a rundown of the state of the rebec and what things I need to do and how I am thinking I will do them and then also a more usual description of how I did what I have done so far.

The state of things
The first part that is broken is the soundboard, which is heavily cracked to the point of probably not being sturdy enough to support the bridge anymore. This is the part that I have already made a replacement for so more details on that will follow later in the article.
There is currently only one of the three tuning pegs remaining, but the one that if left is in good condition. These are going to be one of the trickier things to make as they really have to be turned and as I continue to not have a lathe that is rather difficult. What you can use to make the tapered section of the pegs, which is the only part where the shape is actually important (for the rest it is purely aesthetic), is something that is essentially an oversized pencil sharpener. So, an option would be to get one of them to form the tapered part and then to try and hand carve the heads on the pegs but that seems like it will be unlikely that I will be able to make them much of a match to the original one. A last resort would be to just try and either buy two that match the original or a completely new set of three but that seems to go rather against the spirit of the thing.
Another part that is missing is a peg that goes into the end of the body onto which the tail piece attaches, which is the part the strings are attached to. This is another part that would be quite a small and easy part to make on a lathe but trying to make it without is much more challenging.
The last part that is entirely missing is the bridge. I think this should be relatively easy to make and I should be able to follow a fairly similar process to what I used to make the body and I am also hoping that I should be able to use the same piece of wood.
The rebec came with a bow that is currently missing its hair but is otherwise in good condition. I can’t quite tell how the hair was originally attached and it may end up being rather tricky to replace so I will probably just use a regular violin bow on it initially.
Making the sound board
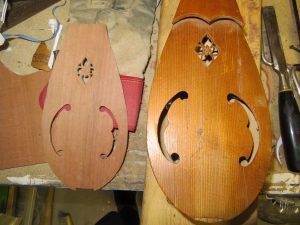
For the sound board I bought a set of sheets intended for the soundboard of a small guitar, with one of the sheets being large enough for the rebec. I traced the shape of the original soundboard on to a piece of paper and then stuck this to the wood. I cut roughly around the outside with a small hacksaw, taking care to stay on the outside of the line and then sanded to the final shape.
The next step was the trickiest, which was cutting the holes in the sound board. These being the two large ‘F’ holes (which aren’t actually f shaped in this case) and the four smaller holes that make up the decorative design towards the top. To cut these holes I first drilled a hole inside the space to be cut out to insert a coping saw blade through. I then cut the rough shape using the coping saw, in the process of which I snapped a lot of blades, which I think is partly due to the blades I had to hand being slightly to thin. Once I had cut one of the F’s I then took a trace of its inside shape to make sure the second once matched, which was necessary as that feature did not show up well on the original tracing due to the sound board being cracked and giving way under the pressure of the pencil. I then refined the shape of all of the holes using needle files, which was slow work as the files are meant for metal and are not very efficient at cutting wood but they were the only thing I had that would fit in the small space.
I then used a plane and chisels to put a slight dome on the soundboard, with it being thickest at the bridge. I then carved the design around the four small holes using chisels and a craft knife. My carving ended up looking a fair bit chunkier and clumsier than the original but was ok considering I don’t really have any tools for that sort of work. Finally, I sanded over the whole surface to smooth it up and remove any marks left from the plane or chisels.

All that remains is to remove the original soundboard and glue this one in its place.
….and then do all the other things I talked about earlier, which will come in part two, eventually.
EDIT: part 2 is here!

When are you going to make a new post, like maybe something whittled from wood?